
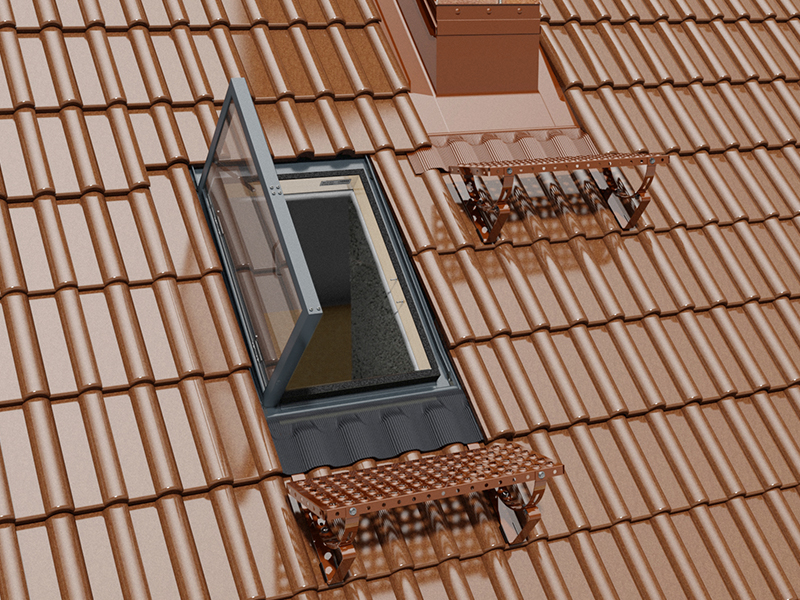
Zasady montażu wyłazu dachowego
Wyłazy dachowe, umożliwiające komfortowe i bezpieczne wyjście na dach, cieszą się rosnącą popularnością wśród inwestorów. Nic dziwnego – duża w tych zasługa funkcjonalności dostępnych na rynku modeli okien wyłazowych, jak również samej ich estetyki. Dzięki tej drugiej, wyłazy dachowe doskonale sprawdzają się nie tylko na poddaszach nieużytkowych, ale i tych zaaranżowanych na cele mieszkalne. Podpowiadamy, jak zaplanować montaż wyłazu dachowego!
Lokalizacja wyłazu dachowego
Właściwie dobrany i poprawnie zamontowany wyłaz z powodzeniem spełni funkcje tradycyjnych okien dachowych. Dlatego przed przystąpieniem do prac montażowych, konieczne jest wyznaczenie optymalnego miejsca do jego zamocowania. Dobrze, by kwestię tę określił sam architekt na etapie projektowania domu.
Przede wszystkim, montaż wyłazu dachowego możliwy jest na różnego rodzaju pokryciach dachowych – w szczególności na dachach o kącie nachylenia 15-60%. W celach zachowania zasad bezpieczeństwa, zalecany jest montaż kołnierza nie niżej niż 85 cm od połogi pomieszczenia na poddaszu.
Zgodnie z przyjętymi zasadami, lokalizacja wyłazu dachowego powinna gwarantować swobodne i bezpieczne wyjście na dach, bez konieczności używania w tym celu drabiny. Jeżeli nie będzie to możliwe, a miejsce montażu wyłazu znajdzie się daleko od komina, konieczna stanie się instalacja dodatkowych zabezpieczeń – stopni i ław kominiarskich.
Montaż wyłazu dachowego – samodzielnie czy przez specjalistę
Montaż wyłazu dachowego nie stanowi szczególnego wyzwania. Zwłaszcza w powstających budynkach, gdzie nie wymaga ingerencji z konstrukcję gotowego dachu. Należy jednak pamiętać o konieczności wyposażenia wyłazu w specjalny kołnierz, mający zapewnić szczelność mocowania do połaci dachowej. Wszelkie prace montażowe muszą być wykonane z dużą dokładnością – najmniejsze szczeliny sprawią, że na poddasze wdzierać się będzie zimne powietrze. Dodatkowo, nieszczelne pokrycie narażone jest na przenikanie wody i gromadzenie wilgoci. Osłabia też ono konstrukcję samego dachu.
Samodzielny montaż wyłazu dachowego jest możliwy – wystarczy przestrzegać zasad instrukcji załączonej przez producenta. Większość modeli montuje się w podobny do siebie sposób – stosunkowo łatwo i szybko. Do przeprowadzenia montażu niezbędne są podstawowe narzędzia: poziomica lub pion ciężarkowy, nóż, wkrętarka, wkręty, gwoździe i szlifierka kątowa. Oczywiście montaż wyłazu można powierzyć też w ręce specjalistów. To dobry pomysł, jeśli prace na wysokościach nie są naszym żywiołem lub nie posiadamy podstawowych umiejętności technicznych. Montaż przez fachowców zalecany jest też w przypadku istniejących dachów, kiedy konieczne jest usunięcie zarówno pokrycia dachowego, jak i warstw izolacji.
Instrukcja montażu wyłazu dachowego
Montaż wyłazu dachowego krok po kroku:
- Ustalenie miejsca montażu wyłazu dachowego
Pierwszym krokiem jest wybór miejsca montażu wyłazu dachowego – optymalnego pod względem korzystania z niego. Dobrze, by okno wyłazowe sąsiadowało bezpośrednio z kominem. Warto upewnić się także, by przy wyjściu, na płaszczyźnie dachu, nie znajdowały się inne elementy konstrukcyjne, które mogłyby utrudniać wychodzenie na dach.
- Wykreślenie linii i usunięcie poszycia
Znając już miejsce montażu wyłazu dachowego, możemy przejść do dalszego etapu. Jest nim wykreślenie na suficie poddasza linii odpowiadających rozmiarom otworu okiennego. W dokładnym narysowaniu linii pomoże nam poziomica i pion ciężarkowy. Następnie usuwamy ocieplenie i przecinamy membranę dachową. W przypadku, gdy na dachu leży dachówka, przycinamy ją szlifierką kątową.
- Wzmocnienie dachu
Na kolejnym etapie montażu wyłazu dachowego stosujemy dodatkowe wzmocnienia dachu. Nad i pod oknem mocujemy w tym celu do krokwi lub kontrłat dodatkowe łaty. Do precyzyjnego ulokowania łat posłuży nam poziomica. Następnie wywijamy membranę dachową na zewnątrz i przymocowujemy do łat wokół otworu.
- Dopasowanie wyłazu dachowego
Otwór montażowy jest już w pełni gotowy do osadzenia w nim wyłazu dachowego. Od strony poddasza mocujemy go za pomocą wkrętów i kątowników, blaszek lub chwytaków – mocowań dostarczonych przez producenta w komplecie z oknem.
- Montaż kołnierza ochronnego
Po przytwierdzeniu wyłazu dachowego należy przykleić kołnierz ochronny, znajdujący się poniżej okna po jego zewnętrznej stronie. Wystarczy odkleić taśmę ochronną i mocno docisnąć kołnierz do poszycia dachu.
- Przytwierdzenie wyłazu od zewnątrz
Kolejnym krokiem jest przymocowanie wyłazu dachowego od strony dachu. Ponownie przydatne będą wkręty lub gwoździe. Uważajmy jednak, by podczas prowadzonych czynności nie uszkodzić membrany dachowej.
- Ułożenie poszycia dachowego
Na koniec pozostaje nam tylko ponowne ułożenia poszycia dachowego. Po przyłożeniu go do dachu nożykiem usuwamy ewentualny nadmiary gumy, zapewniającej wodoszczelność. Przy dachach z gontu bitumicznego miejsce montażu warto zabezpieczyć specjalnym lepiszczem.